Elementalist DPS Build - ESO Guide
Elementalist DPS build which combines Fire, Ice and Lightning themes to deal a lot of damage. It is intended for Group content, not Solo.
This build also provides group support at all times, it increases everyone's chance to inflict Status Effects by 100% thanks to the Status Knife and it increases enemies' Flame damage taken by 6%. I will also include a gear setup using Alkosh and Zen's Redress, if you want to fulfill the Zenkosh support role.
Works in normal and veteran dungeons, trials, hard modes, Dragonstar Arena, and Blackrose Prison.
Subclassing
Combination


Base Class
This build can use either Dragonknight, Warden or Sorcerer as your base class.
Skill Setups
Base Setup
A base setup that will work for most situations and which should be your starting point when making situational setups


| Front Bar | Back Bar |
|---|---|
| Slot 1: Molten Whip | Slot 1: Flames of Oblivion |
| Slot 2: Burning Embers | Slot 2: Arctic Blast |
| Slot 3: Hurricane | Slot 3: Engulfing Flames |
| Slot 4: Traveling Knife | Slot 4: Stampede |
| Slot 5: Barbed Trap | Slot 5: Winter's Revenge |
| Ultimate: Power Overload | Ultimate: Standard of Might |
- Traveling Knife - Frost , Assassin's Misery , Brutality and Sorcery
- Ulfsild's Contingency - Frost , Lingering Torment , Brutality and Sorcery


- Molten Whip - a strong spammable that will deal more damage after using other Ardent Flame skills (in this skill setup it's going to be Burning Embers, Flames of Oblivion, Engulfing Flames and Standard of Might) and will also grant you 300 Weapon and Spell Damage
- Burning Embers - a single target DoT which heals you for 100% of the damage it causes
- Hurricane - a skill that deals a lot of damage per cast and triggers the Expert Mage passive, increasing your Weapon and Spell Damage by 108
- Traveling Knife - a skill that increases enemies' chance to get affected by Status Effects by 100% which is a decent DPS boost for you and your entire group. It will also grant you Major Brutality and Sorcery, increasing your Weapon and Spell Damage by 20%.
- Barbed Trap - a DoT that will also apply Hemorrhage status effect at the start and grant you Minor Force buff, increasing your Critical Damage by 10%. It will also trigger the Slayer passive
- Power Overload - an ultimate we won't be using most of the time, but we'll keep slotted on frontbar for the passive 108 Weapon and Spell Damage from Expert Mage passive. When starting a fight with a lot of Ultimate stored up you can use Power Overload light attacks until you're at 250 Ultimate and only then cast Standard of Might
- Flames of Oblivion - an ability that deals lots of damage per cast and passively grants you crucial Major Savagery buff, which increases your Critical Chance by 12%. It will also empower your Molten Whip
- Arctic Blast - an ability with a higher chance to proc the Chilled status effect, which deals increased damage thanks to the Glacial Presence passive
- Engulfing Flames - an AoE DoT that will empower your Molten Whip and increase enemies' Flame damage taken by 6%
- Stampede - a gap closer which leaves a ground DoT under your target which will constantly proc your Weapon Damage enchantment and increase your Direct Damage done thanks to Merciless Charge set
- Winter's Revenge - a ground DoT that deals massive damage when you count in the Chilled procs, triggered thanks to this skill's increased innate chance to proc status effects
- Standard of Might - an extremely strong ultimate that will deal AoE damage, increase all of your damage done and decrease your damage taken. Try to stack up your DoTs before using it
 Merciless Charge
Burning Embers is the first skill that has to go when you need to slot something situational, unless the situational skill specifically says that it's replacing something else, or unless you need the heal from Burning Embers. Winter's Revenge is the second skill that has to go
- Elemental Susceptibility - use it as your source of Major Breach whenever you're assigned to mechanics that separate you from your group, like for example portal in the Nahviintaas fight, Reef Hearts in the Reef Guardian fight, bridge in the Taleria fight, etc.
- Resolving Vigor - a more reliable self heal for fights where you can't heal with Burning Embers (because enemies become periodically immune) or with Arctic Blast (because you're constantly surrounded by enemies)
- Critical Surge - a very strong self-heal which is also a source of Major Brutality and Sorcery
- Proximity Detonation - extremely good ability for trash packs, you can pre-cast it as you're running into them
- Ulfsild's Contingency - decent AoE spammable which will deal high damage thanks to the Piercing Cold passive
- Northern Storm - an Ultimate you should use in trash packs. It's weaker than Standard of Might when you can utilize its full duration but this will almost never happen in trash packs which usually die way faster
- Whirling Blades - a Stamina-costing AoE spammable which also executes low Health enemies. Very useful because this build struggles with Magicka sustain, especially in trash packs
 Elemental Susceptibility
 Resolving Vigor
 Critical Surge
Priority List
This is just a list of priorities. Simply recast abilities when they run out and follow this list of priorities when there are multiple things to refresh.
- If you're starting the fight with a lot of Ultimate stored up, activate Power Overload and use it to empower your Light Attacks until you're at 250 Ultimate, at which point you should use Standard of Might
- Use Traveling Knife. You can refresh it a bit early because letting Major Brutality buff drop is really bad
- Use Barbed Trap
- Use Stampede
- Use Arctic Blast
- Use Winter's Revenge
- Use Molten Whip if it's at 3 stacks
- Use Flames of Oblivion
- Use Engulfing Flames
- Use Burning Embers
- Use Standard of Might
- Use Molten Whip
Pre-buff
These abilities can be pre-cast before entering combat
Final Setups
A few examples of final setups you could end up with after applying the situational skills to the base setup
A setup for trash packs


| Front Bar | Back Bar |
|---|---|
| Slot 1: Molten Whip | Slot 1: Flames of Oblivion |
| Slot 2: Engulfing Flames | Slot 2: Arctic Blast |
| Slot 3: Hurricane | Slot 3: Proximity Detonation |
| Slot 4: Ulfsild's Contingency | Slot 4: Stampede |
| Slot 5: Whirling Blades | Slot 5: Winter's Revenge |
| Ultimate: Power Overload | Ultimate: Northern Storm |
What Changes
Changes compared to the Base Setup
- In this setup Molten Whip is slotted just for the Weapon and Spell Damage bonus it grants you after using Ardent Flame abilities. Ulfsild's Contingency is your main spammable. You should still switch to Molten Whip if there's only one enemy left
- Burning Embers is replaced by Proximity Detonation
- Proximity Detonation and Engulfing Flames swap their places around
- Barbed Trap is replaced by Whirling Blades, because it helps you sustain your Magicka by giving you access to a Stamina spammable. It's also a very strong spammable when enemies are low Health. You don't need the Minor Force from Barbed Trap thanks to the trash setup using Velothi Ur-Mage's Amulet
- Standard of Might is replaced by Northern Storm
 Velothi Ur-Mage's Amulet
A setup you should use if you don't want to ever swap your skills around
| Front Bar | Back Bar |
|---|---|
| Slot 1: Molten Whip | Slot 1: Flames of Oblivion |
| Slot 2: Engulfing Flames | Slot 2: Arctic Blast |
| Slot 3: Hurricane | Slot 3: Burning Embers |
| Slot 4: Traveling Knife | Slot 4: Stampede |
| Slot 5: Barbed Trap | Slot 5: Winter's Revenge |
| Ultimate: Power Overload | Ultimate: Standard of Might |
What Changes
Changes compared to the Base Setup
- The only change is swapping Engulfing Flames and Burning Embers around. This way, you can use Engulfing Flames as a "makeshift" AoE spammable
Passives
There are no passives you need to skip with this build.
 Class
Class
 Weapon
 Armor
Armor
 Guild
Guild
 Racial
 Craft
Craft
Class - Ardent Flame
 Combustion - High Priority
 Warmth - High Priority
 Searing Heat - High Priority
 World in Ruin - High Priority
Class - Winter's Embrace
 Glacial Presence - High Priority
 Frozen Armor - Medium Priority
 Icy Aura - Low Priority
 Piercing Cold - High Priority
Class - Storm Calling
 Capacitor - High Priority
 Energized - High Priority
 Amplitude - High Priority
 Expert Mage - High Priority
Weapon - Dual Wield
The tooltips for Focused Killer and Ruffian are misleading. They also buff Light and Heavy Attacks.
 Focused Killer - High Priority
 Ambidextrous - High Priority
 Controlled Fury - High Priority
 Ruffian - Medium Priority
 Twin Blade and Blunt - High Priority
Weapon - Two Handed
 Forceful - Medium Priority
 Heavy Weapons - High Priority
Balanced Blade - High Priority
 Follow Up - Low Priority
 Battle Rush - Low Priority
Armor - Light Armor
 Grace - Low Priority
 Evocation - Low Priority
 Spell Warding - Low Priority
 Prodigy - High Priority
 Concentration - High Priority
Armor - Medium Armor
 Dexterity - High Priority
 Wind Walker - Low Priority
 Improved Sneak - Not needed
 Agility - High Priority
 Athletics - Low Priority
Guild - Fighters Guild
 Intimidating Presence - Low Priority
 Slayer - High Priority
 Banish the Wicked - Medium Priority
Skilled Tracker - Low Priority
Bounty Hunter - Not needed
Guild - Mages Guild
 Persuasive Will - Not needed
 Mage Adept - Low Priority
 Everlasting Magic - Low Priority
Magicka Controller - Low Priority
Might of the Guild - Low Priority


Race - Your race
Get all of your racials, no matter which race you are
Craft - Alchemy
 Solvent Proficiency - Not needed
 Keen Eye: Reagents - Not needed
 Medicinal Use - High Priority
 Chemistry - Not needed
 Laboratory Use - Not needed
 Snakeblood - Not needed
Gear
Base Setup
A base setup that will work for most situations and which should be your starting point when making situational setups
Switching gear for trash packs isn't worth it unless you're using gear-swap addons.
Default setup
| Gear Slot | Set | Weight/Type | Trait | Enchantment |
|---|---|---|---|---|
 Head Head |
Zaan | Light | Divines | Magicka |
 Shoulders Shoulders |
Zaan | Light | Divines | Magicka |
 Chest Chest |
Slivers of the Null Arca | Medium | Divines | Magicka |
 Hands Hands |
Runecarver's Blaze | Light | Divines | Magicka |
 Belt Belt |
Runecarver's Blaze | Light | Divines | Magicka |
 Legs Legs |
Slivers of the Null Arca | Medium | Divines | Magicka |
 Boots Boots |
Runecarver's Blaze | Light | Divines | Magicka |
 Necklace Necklace |
Slivers of the Null Arca | Jewelry | Bloodthirsty | Increase Magical Harm |
 Ring Ring |
Runecarver's Blaze | Jewelry | Bloodthirsty | Increase Magical Harm |
| Ring |
Runecarver's Blaze | Jewelry | Bloodthirsty | Increase Magical Harm |
 Frontbar Main Hand Frontbar Main Hand |
Slivers of the Null Arca | Dagger | Charged | Poison |
| Frontbar Off Hand |
Slivers of the Null Arca | Dagger | Charged | Flame |
| Backbar Main Hand |
Merciless Charge | Greatsword | Infused | Weapon Damage |
 Zaan
Zaan Divines
 Magicka
 Slivers of the Null Arca
 Runecarver's Blaze
 Bloodthirsty
 Increase Magical Harm
 Charged
 Poison
 Flame
Flame Infused
 Weapon Damage
When choosing different situational sets you should usually replace Slivers of Null Arca and Zaan. Runecarver’s Blaze is very strong in both Single Target and AoE fights so most of the times there's no point in replacing it.
The base setup uses 2 Medium and 5 Light armor pieces. You can gain more DPS from using more Medium armor but it'll cause sustain issues so you'll have to get additional sustain from for example changing food. You might also already have bonus sustain from certain racials, like for example from being a Breton
For example, a default setup for trash packs would replace Slivers of Null Arca with Sul-Xan's Torment and Zaan with Velothi Ur-Mage's Amulet
 Sul-Xan's Torment
Gear that can be stronger than the setup from the table in specific situations or when specific circumstances are present
- Ansuul’s Torment - the most reliable set which works well both in Single Target and AoE fights. It has a penetration line which allows you to use more Medium Armor
- Velothi Ur-Mage's Amulet - the best option for trash packs and AoE fights where your Light Attacks weren't contributing much to the total DPS anyway
- Sul-Xan's Torment - the best set for trash packs and for bosses that regularly spawn smaller adds
- Highland Sentinel - the strongest set if you are able to stand still in a certain encounter
- Roar of Alkosh - a support set that allows you to provide 6000 penetration for your team, as long as they provide you with at least 1 synergy every 10 seconds. It's extremely beneficial to have at least 1 Alkosh user in groups.
- Ze’n’s Redress - a support set which increases enemies damage taken by up to 5% based on your amount of DoTs. This build has enough DoTs to always get the 5% bonus without any changes to the skill setup.
 Ansuul’s Torment
 Highland Sentinel
 Roar of Alkosh
 Ze’n’s Redress
Gear that is easier to obtain and can be used while you work towards the best gear
Crafted:
All of these are tradable and can be bought from other players
No Overland, Dungeon or Trial gear is listed as the Crafted options are superior.
Final Setups
A few examples of final setups you could end up with after applying situational rules to the base setup
This is the crafted gear setup you can start with
| Gear Slot | Set | Weight/Type | Trait | Enchantment |
|---|---|---|---|---|
| Head |
Assassin's Guile | Light | Training/ Divines | Magicka |
| Shoulders |
Assassin's Guile | Light | Training/ Divines | Magicka |
| Chest |
Order's Wrath | Medium | Training/ Divines | Magicka |
| Hands |
Order's Wrath | Light | Training/ Divines | Magicka |
| Belt |
Order's Wrath | Light | Training/ Divines | Magicka |
| Legs |
Order's Wrath | Light | Training/ Divines | Magicka |
| Boots |
Order's Wrath | Light | Training/ Divines | Magicka |
| Necklace |
Tide-Born Wildstalker | Jewelry | Bloodthirsty | Increase Magical Harm |
| Ring |
Tide-Born Wildstalker | Jewelry | Bloodthirsty | Increase Magical Harm |
| Ring |
Tide-Born Wildstalker | Jewelry | Bloodthirsty | Increase Magical Harm |
| Frontbar Main Hand |
Tide-Born Wildstalker | Dagger | Charged | Poison |
 Frontbar Off Hand Frontbar Off Hand |
Tide-Born Wildstalker | Dagger | Charged | Flame |
| Backbar Main Hand |
Tide-Born Wildstalker | Greatsword | Infused | Weapon Damage |
 Training
What Changes
Changes compared to the Base Setup
This is a setup you should use if you have no access to any Trial gear
| Gear Slot | Set | Weight/Type | Trait | Enchantment |
|---|---|---|---|---|
| Head |
Zaan | Medium | Divines | Magicka |
| Shoulders |
Zaan | Light | Divines | Magicka |
| Chest |
Tide-Born Wildstalker | Medium | Divines | Magicka |
| Hands |
Runecarver's Blaze | Light | Divines | Magicka |
| Belt |
Runecarver's Blaze | Light | Divines | Magicka |
| Legs |
Tide-Born Wildstalker | Medium | Divines | Magicka |
| Boots |
Runecarver's Blaze | Light | Divines | Magicka |
| Necklace |
Tide-Born Wildstalker | Jewelry | Bloodthirsty | Increase Magical Harm |
| Ring |
Runecarver's Blaze | Jewelry | Bloodthirsty | Increase Magical Harm |
| Ring |
Runecarver's Blaze | Jewelry | Bloodthirsty | Increase Magical Harm |
| Frontbar Main Hand |
Tide-Born Wildstalker | Dagger | Charged | Poison |
| Frontbar Off Hand |
Tide-Born Wildstalker | Dagger | Charged | Flame |
| Backbar Main Hand |
Merciless Charge | Greatsword | Infused | Weapon Damage |
What Changes
Changes compared to the Base Setup
- Slivers of Null Arca gets replaced by Tide-Born Wildstalker
- It uses 1 additional Medium armor piece because Tide-Born Wildstalker has a penetration line
This is a more universal setup which will do well in any fight, whether it's AoE or Single Target focused. Use it if you don't want to ever adjust your gear for specific fights
| Gear Slot | Set | Weight/Type | Trait | Enchantment |
|---|---|---|---|---|
| Head |
Zaan | Medium | Divines | Magicka |
| Shoulders |
Zaan | Light | Divines | Magicka |
| Chest |
Ansuul's Torment | Medium | Divines | Magicka |
| Hands |
Runecarver's Blaze | Light | Divines | Magicka |
| Belt |
Runecarver's Blaze | Light | Divines | Magicka |
| Legs |
Ansuul's Torment | Medium | Divines | Magicka |
| Boots |
Runecarver's Blaze | Light | Divines | Magicka |
| Necklace |
Ansuul's Torment | Jewelry | Bloodthirsty | Increase Magical Harm |
| Ring |
Runecarver's Blaze | Jewelry | Bloodthirsty | Increase Magical Harm |
| Ring |
Runecarver's Blaze | Jewelry | Bloodthirsty | Increase Magical Harm |
| Frontbar Main Hand |
Ansuul's Torment | Dagger | Charged | Poison |
| Frontbar Off Hand |
Ansuul's Torment | Dagger | Charged | Flame |
| Backbar Main Hand |
Merciless Charge | Greatsword | Infused | Weapon Damage |
What Changes
Changes compared to the Base Setup
- Slivers of Null Arca gets replaced by Ansuul’s Torment because it's a more reliable set which works in both AoE and Single Target fights
- It uses 1 additional Medium armor piece because Ansuul’s Torment has a penetration line
This is the ideal setup for trash packs
| Gear Slot | Set | Weight/Type | Trait | Enchantment |
|---|---|---|---|---|
| Head |
Zaan | Light | Divines | Magicka |
| Shoulders |
Runecarver's Blaze | Light | Divines | Magicka |
| Chest |
Sul-Xan's Torment | Medium | Divines | Magicka |
| Hands |
Runecarver's Blaze | Light | Divines | Magicka |
| Belt |
Runecarver's Blaze | Light | Divines | Magicka |
| Legs |
Sul-Xan's Torment | Medium | Divines | Magicka |
| Boots |
Runecarver's Blaze | Light | Divines | Magicka |
| Necklace |
Velothi Ur-Mage's Amulet | Jewelry | Bloodthirsty | Increase Magical Harm |
| Ring |
Sul-Xan's Torment | Jewelry | Bloodthirsty | Increase Magical Harm |
| Ring |
Runecarver's Blaze | Jewelry | Bloodthirsty | Increase Magical Harm |
| Frontbar Main Hand |
Sul-Xan's Torment | Dagger | Charged | Poison |
| Frontbar Off Hand |
Sul-Xan's Torment | Dagger | Charged | Flame |
| Backbar Main Hand |
Merciless Charge | Greatsword | Infused | Weapon Damage |
What Changes
Changes compared to the Base Setup
- Slivers of Null Arca gets replaced by Sul-Xan's Torment
- Zaan gets replaced by Velothi Ur-Mage's Amulet
This is a setup for fulfilling the "Zenkosh" support role
| Gear Slot | Set | Weight/Type | Trait | Enchantment |
|---|---|---|---|---|
| Head |
Zaan | Medium | Divines | Magicka |
| Shoulders |
Zaan | Light | Divines | Magicka |
| Chest |
Roar of Alkosh | Medium | Divines | Magicka |
| Hands |
Roar of Alkosh | Medium | Divines | Magicka |
| Belt |
Roar of Alkosh | Medium | Divines | Magicka |
| Legs |
Roar of Alkosh | Medium | Divines | Magicka |
| Boots |
Roar of Alkosh | Medium | Divines | Magicka |
| Necklace |
Z'en's Redress | Jewelry | Bloodthirsty | Increase Magical Harm |
| Ring |
Z'en's Redress | Jewelry | Bloodthirsty | Increase Magical Harm |
| Ring |
Z'en's Redress | Jewelry | Bloodthirsty | Increase Magical Harm |
| Frontbar Main Hand |
Z'en's Redress | Dagger | Charged | Poison |
| Frontbar Off Hand |
Z'en's Redress | Dagger | Charged | Flame |
| Backbar Main Hand |
Merciless Charge | Greatsword | Infused | Weapon Damage |
What Changes
Changes compared to the Base Setup
- Runecarver’s Blaze is replaced by Z’en
- Slivers of Null Arca is replaced by Roar of Alkosh
- You can also use the armor weight composition shown here with the Regular Runecarver’s Blaze/Slivers of Null Arca setup when someone else in your group is providing penetration with their Roar of Alkosh
Champion Points
 Warfare
 Deadly Aim
 Siphoning Spells
 Fitness
 Craft
CraftRace
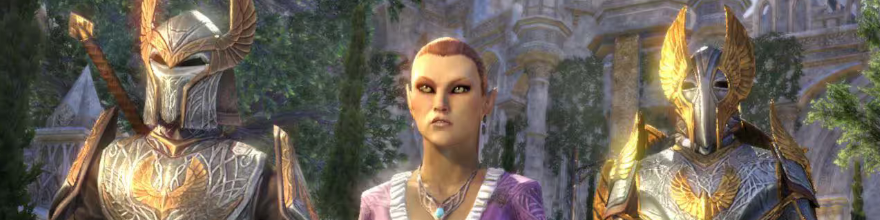
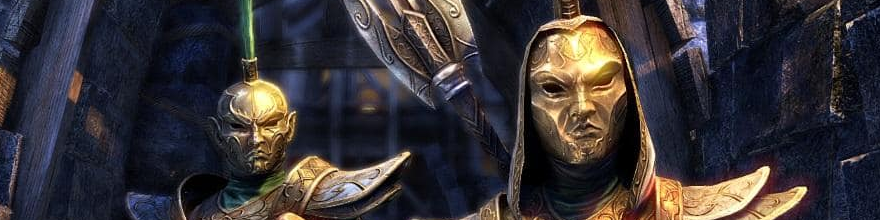
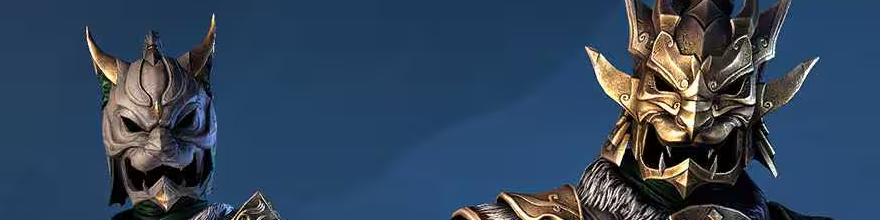
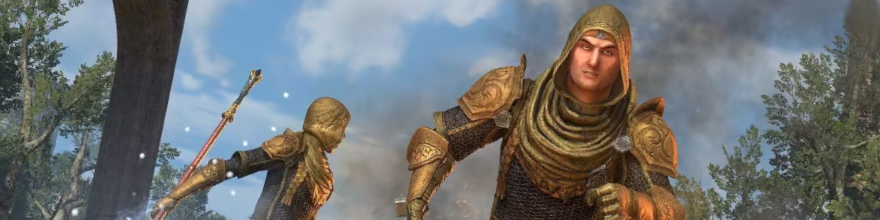
The difference between best and worst race is about 5% of DPS and there is no content in the entire game that you'd be blocked from completing because of choosing a bad race.




Other decent options



 Spell Attunement
2310 Spell Resistance (doubled when Burning, Concussed or Chilled), 130 Magicka Recovery
Spell Attunement
2310 Spell Resistance (doubled when Burning, Concussed or Chilled), 130 Magicka Recovery
Mundus
-
 Default
The Thief
5.53% Critical Chance(9.04% with 7 Divines)Use most of the time
Attributes
You should always put all 64 attribute points into Magicka.
Food
-
 Default
Artaeum Pickled Fish Bowl
Max Health +5,414 Max Magicka +4,938Use for most content.Cheaper alternative Solitude Salmon-Millet SoupDifference Max Health +5,395 −19 Max Magicka +4,936 −2 -
 Sustain
Clockwork Citrus Filet
Max Health +3,326 Max Magicka +3,080 Health Recovery +406 Magicka Recovery +338Use when you need more sustain.Cheaper alternative Witchmother's Potent BrewDifference Max Health +3,094 −232 Max Magicka +2,856 −224 Health Recovery — −406 Magicka Recovery +315 −23 -
 Full Damage
Tomato Garlic Chutney
Max Magicka +6,048Max Magicka only. Use for parsing or content where you can get away without Max Health. -
 Sustain
Ghastly Eye Bowl
Max Magicka +4,592 Magicka Recovery +459Use when you need Magicka Recovery without Max Health.


Potions
-
Default
Tri-Stat Potion
Restore Health Restore Stamina Restore MagickaMost of the time you should use Tri-Stat potions for the extra resources and healing. -
Full Damage
Heroism Potion
Restore Magicka Restore Stamina Minor HeroismHeroism potions are an expensive damage option because they generate Ultimate.

 Columbine
 Bugloss
 Mountain Flower

 Dragon Rheum
 Dragon's Blood
 Essence of Magicka
 Fresh Apples and Eidar Cheese